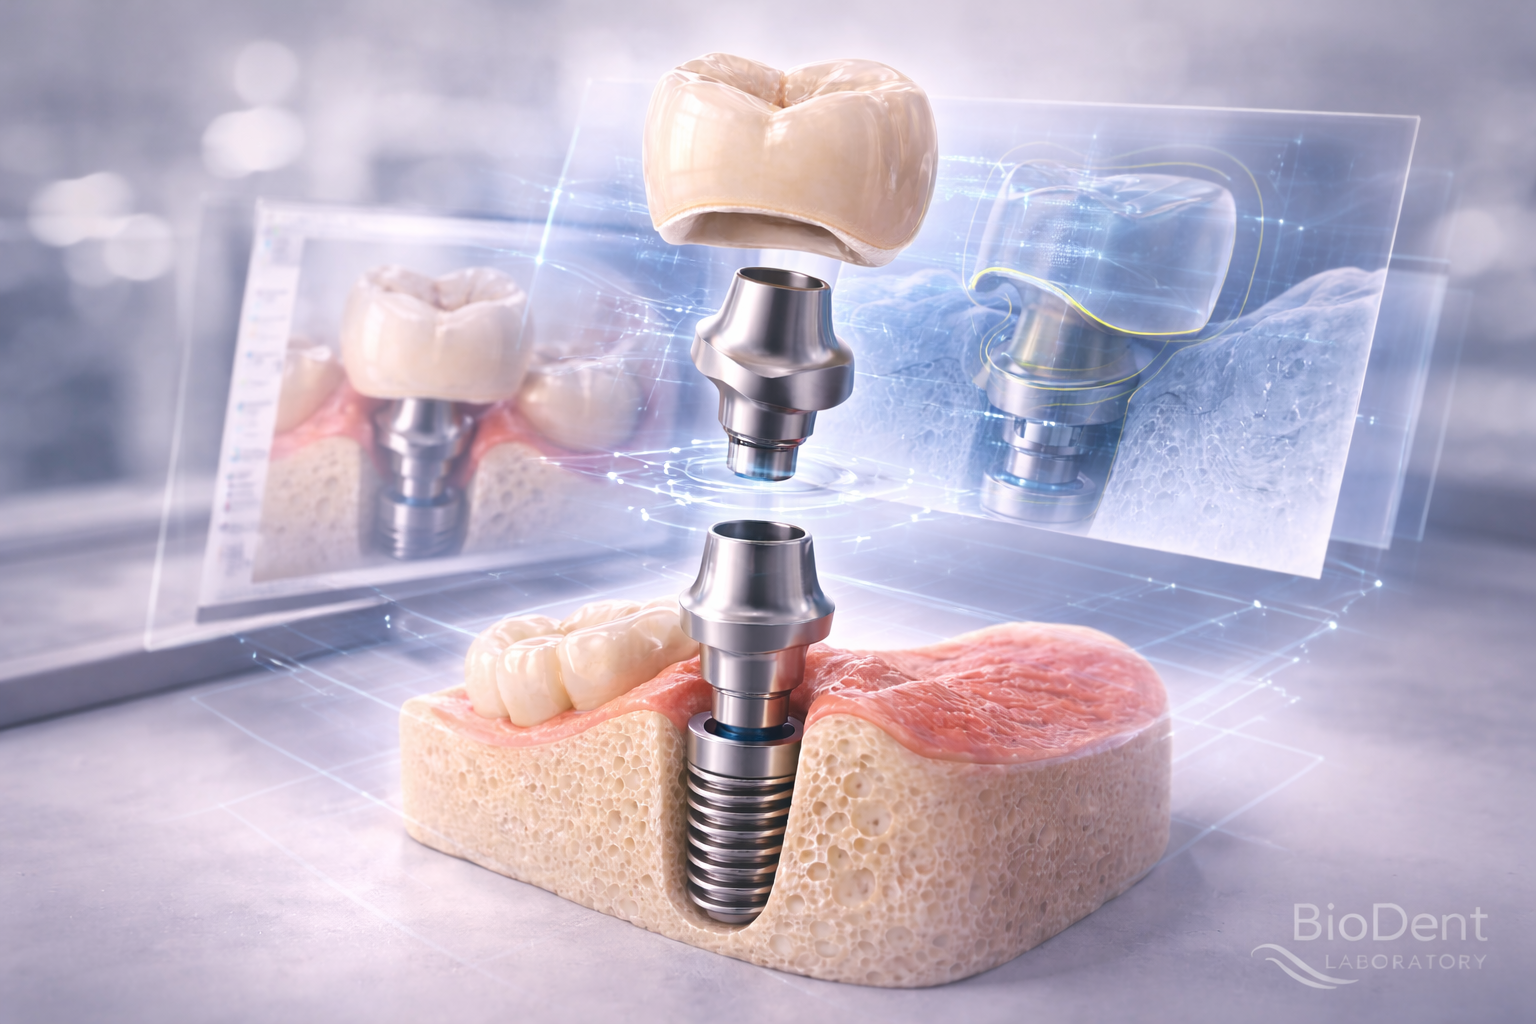
Implant Prosthetic Planning Workflow
Successful implant restorations rarely happen by accident. The most predictable cases are usually the result of structured prosthetic planning rather than reactive problem-solving at the end of treatment.
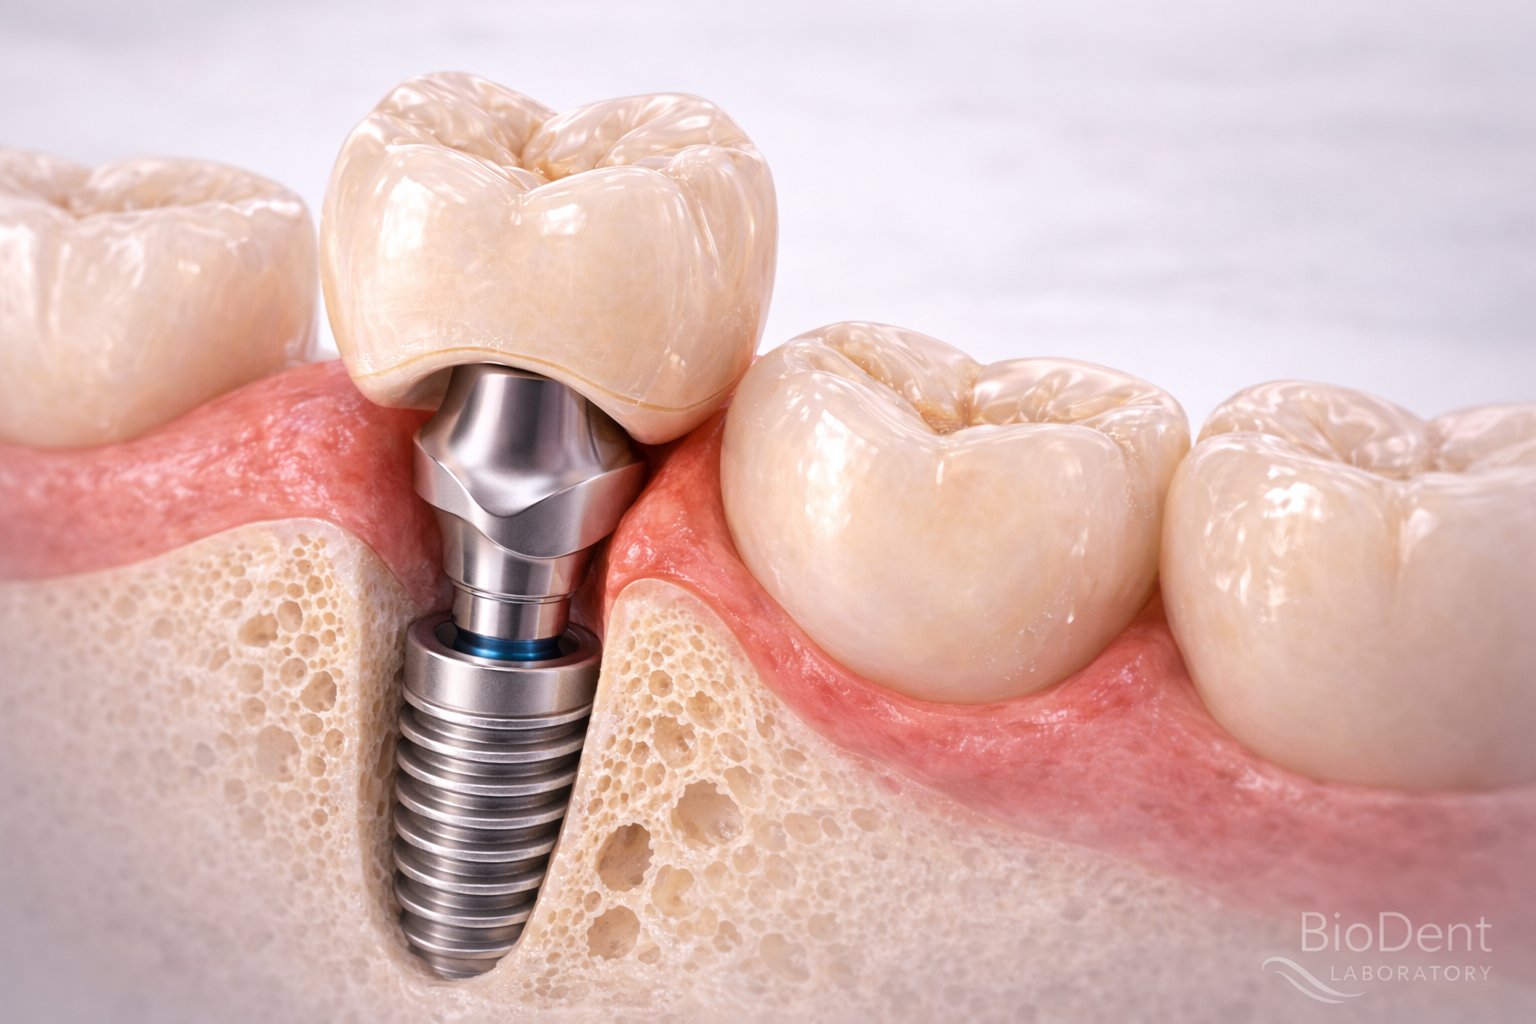
In implant dentistry, the final restoration depends on a chain of connected decisions: implant position, soft tissue management, abutment selection, crown contour, retention method, and communication with the lab. When these decisions are made in the right sequence, the final outcome becomes more predictable, more maintainable, and more esthetic.
This page explains the implant prosthetic planning workflow step by step and shows how dentists can move from implant placement to final restoration with greater restorative control.
Why Prosthetic Planning Should Start Early
A common mistake in implant dentistry is treating prosthetic planning as something that begins only after the implant is already placed. In reality, prosthetic planning should begin much earlier.
The final crown, tissue architecture, and maintenance requirements should influence treatment decisions from the beginning. When restorative thinking starts too late, the team is often forced to compensate for limitations that could have been prevented.
Early prosthetic planning improves:
- crown position
- implant angulation decisions
- abutment selection
- margin placement
- tissue shaping
- retention strategy
- long-term maintenance
The earlier the restorative plan becomes clear, the fewer compromises usually appear later.
Step 1: Start with the Final Restoration in Mind
A strong implant prosthetic workflow begins with the intended final restoration.
Before selecting components, the team should understand:
- what the final crown should look like
- where the crown should emerge
- how the tissue should be supported
- whether the case is esthetic-driven or function-driven
- how the restoration will be cleaned and maintained
This is often described as a crown-driven approach. Instead of asking the final restoration to adapt to everything that came before it, the workflow is designed backward from the final objective.
This principle is closely related to Dental Implant Abutments.
Step 2: Evaluate Implant Position Prosthetically
Once the restorative objective is clear, implant position must be evaluated from a prosthetic perspective.
Even a surgically successful implant may create restorative compromise if its depth, angle, or facial-lingual position does not support the final crown well.
Implant position influences:
- crown path
- screw access direction
- crown contour
- emergence profile
- margin location
- abutment design
- long-term hygiene access
For a deeper explanation, see How Implant Position Affects Abutment Choice.
Step 3: Define the Soft Tissue Goal
Soft tissue should not be treated as a passive background element. It is part of the restorative outcome.
The team should define:
- desired gingival contour
- papilla support expectations
- tissue thickness considerations
- healing needs
- whether provisional shaping will be required
Cases in the esthetic zone or with thin tissue biotypes often require more tissue-focused planning.
For more on this, see Soft Tissue Management Around Dental Implants.
Step 4: Choose the Right Abutment Strategy
After implant position and tissue needs are evaluated, abutment strategy becomes more clear.
The team may need to decide between:
- stock vs custom abutment
- titanium vs zirconia
- standard vs more contour-controlled design
- different margin strategies
The right choice depends on how much restorative control the case requires.
For deeper reading, see: Stock vs Custom Abutments and Titanium vs Zirconia Abutments.
Step 5: Plan Emergence Profile and Crown Contour
Once the abutment strategy is defined, the restoration should be planned through the cervical and emergence zones.
This is where many implant restorations succeed or fail esthetically and biologically.
The team should consider:
- cervical contour
- emergence profile
- tissue support
- crown bulk
- hygiene accessibility
- natural transition from implant to crown
If these areas are not planned properly, the restoration may become bulky, difficult to clean, or visually unnatural.
For more on these topics, see: Implant Emergence Profile and Implant Crown Contour and Soft Tissue Support.
Step 6: Decide on the Retention Method
Retention choice should not be made at the very end. It should be built into the prosthetic workflow.
The key question is whether the case is better suited for:
- screw-retained restoration
- cement-retained restoration
This decision depends on:
- implant angle
- margin accessibility
- esthetic priorities
- maintenance expectations
- serviceability over time
For a complete comparison, see Screw-Retained vs Cement-Retained Restorations.
Step 7: Coordinate Clearly with the Dental Lab
A strong prosthetic workflow depends on strong clinic-lab communication.
The lab should not only receive a scan. It should receive restorative intent.
Useful case transfer information often includes:
- clean scan data
- scan body accuracy
- implant system information
- tissue photos
- occlusal records
- restorative priorities
- retention preference
- esthetic concerns
For more on this topic, see Digital Communication Between Clinic and Dental Lab.
Step 8: Use Digital Workflow to Improve Predictability
Digital workflow improves implant prosthetic planning by making it easier to connect the implant position, tissue form, abutment design, and crown shape before fabrication.
This allows the restorative team to evaluate:
- fit expectations
- contour logic
- margin location
- screw access
- crown-driven design
- case-specific restorative adaptation
For more on this process, see Digital Workflow for Implant Abutments.
Step 9: Deliver and Verify the Restoration Carefully
The planning workflow does not end when the crown is fabricated. Final delivery is part of the prosthetic workflow too.
The team should verify:
- abutment seating
- crown fit
- margin behavior
- occlusion
- cement cleanup if relevant
- tissue response
- hygiene access
For more on this stage, see Implant Crown Delivery Protocol for Dentists.
Common Workflow Mistakes
Some common planning mistakes weaken implant restorative outcomes:
- starting prosthetic thinking too late
- separating surgery from restorative goals
- underestimating tissue behavior
- choosing abutments before defining crown design
- treating retention as an afterthought
- weak clinic-lab communication
- relying on generic solutions in sensitive cases
These mistakes usually do not happen because the case is unusually difficult. They happen because the workflow lacks structure.
Conclusion
Implant prosthetic planning workflow is the framework that connects every major restorative decision in implant dentistry.
When the workflow begins with the final restorative goal and proceeds through implant position, tissue planning, abutment selection, contour control, retention strategy, and lab communication, the final restoration becomes much more predictable.
Strong implant outcomes are usually not the result of one perfect step. They are the result of many connected decisions made in the right order.
FAQ
What is an implant prosthetic planning workflow?
It is the structured restorative process that guides implant cases from final crown planning to abutment design, tissue support, retention choice, and delivery.
Why should prosthetic planning begin early?
Because late planning often forces the clinician to compensate for implant position, tissue, or component limitations that could have been prevented.
Does implant position affect the entire workflow?
Yes. Implant position influences abutment design, crown shape, emergence profile, margin placement, and retention method.
Why is soft tissue part of prosthetic planning?
Because tissue contour directly affects esthetics, emergence profile, and long-term restoration stability.
Does digital workflow improve implant prosthetic planning?
Yes. It helps connect scan data, implant position, restorative design, and lab communication more precisely.
Why is clinic-lab communication so important?
Because even a strong case can become compromised if the lab does not receive clear restorative goals and accurate digital information.

